How To Choose Tile Spacer Size?
Aug 31,2023
View: 1236
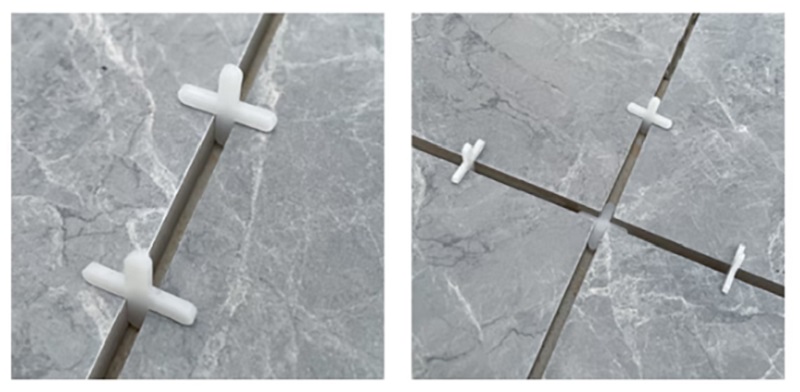
When it comes to indoor tile installation, maintaining a uniform and consistent spacing between tiles is crucial. A slight misalignment, when using traditional methods to install tiles, can have a ripple effect across the entire area. The use of tile spacers ensures that grout lines are level and straight. These are small plastic products designed to be inserted between tiles, and they are reusable. While they are easy to use, understanding and using them correctly is essential to achieve optimal results.
Why Use Tile Spacers?
In the process of installing tiles, not using tile spacers can lead to various issues, which is why it's essential to employ them to address these concerns.
Addressing Tile Expansion and Contraction:
Tiles can expand and contract due to heat and moisture. Without the use of tile spacers, tight spacing between tiles may cause cracking or damage when the tiles expand or contract. Using spacers provides a specific gap, allowing tiles to expand and contract freely, reducing the risk of cracking.
Avoiding Tile Collision and Friction:
Without tile spacers, tiles during installation may collide and create friction, resulting in breakage, scratches, or surface damage. Using spacers prevents direct contact between tiles, minimizing the risk of damage.
Maintaining Even Spacing Between Tiles:
Lack of spacer support between tiles may lead to inconsistent spacing. The use of spacers ensures that the gaps between tiles remain consistent, resulting in a neat and uniform tiled surface.
Factors Affecting Tile Spacer Size Selection
When choosing the size of tile spacers, several factors need consideration to ensure consistency and aesthetic appeal in tile installation. Here are the key factors influencing the selection of tile spacer sizes:
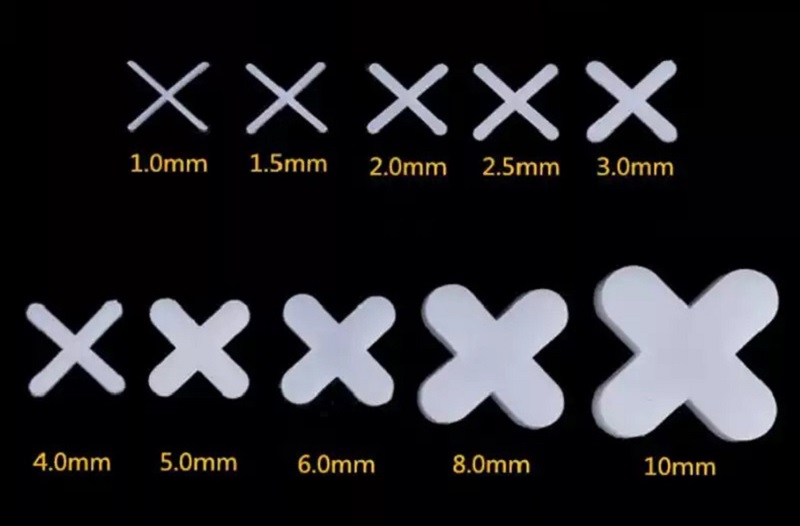
1. Tile Size:
The dimensions of the tiles have a decisive impact on the required tile spacer size. Generally, smaller spacers are needed for smaller tiles. For large-format tiles, using 1/8 or 3/16 spacers is advisable. They help adjust size discrepancies and ensure a flat and even surface. Smaller tiles, such as mosaic tiles, typically require narrower spacers (e.g., 1/16 or 1/8) to maintain intricate patterns.
2. Tile Layout and Design:
The layout of tiles also affects the size of tile spacers needed. For linear arrangements, smaller spacers can be chosen. Larger spacers are required for brick pattern layouts to achieve a seamless effect. Special designs like herringbone or T-shaped layouts may necessitate specific spacers.
3. Grout Line Width:
The width of grout lines plays a crucial role in spacer selection. For narrow grout lines, use smaller spacers (e.g., 1/16 or 1/8) for a seamless appearance. Wider spacers (e.g., 3/16 or 1/4) are suitable for those who prefer thicker grout lines for a more pronounced look.
4. Aesthetic Preferences and Trends:
When choosing tile spacer sizes, it's important to consider personal preferences and current design trends. Some individuals prefer wider grout lines to highlight the beauty of the tiles, while others lean towards narrower lines. Choose spacers that align with personal preferences and design trends.
5. Substrate Evenness:
The flatness of the substrate affects both tile installation and spacer size selection. In cases of uneven substrates, larger spacers can help compensate for inconsistencies and ensure a level surface. Addressing any irregularities in the substrate before tile installation is crucial.
6. Project Location:
Different project locations also influence the size of tile spacers needed. For high-humidity areas like showers or pools, larger tile spacers are necessary to ensure adequate drainage. Additionally, outdoor tile installations, exposed to greater temperature fluctuations, may require larger tile spacers.
How to Choose the Right Tile Spacer Size
Choosing the correct grout width is crucial for the overall appearance of tiles. Small tiles, up to 8 inches, usually come with built-in lugs and don't require spacers.

We generally recommend using 3/8'' to 1/16'' grout lines for walls and 1/16'' to 1/8'' for floors. For antique-style tiles, exterior wall tiles, or balcony tiles, a wider gap, such as 3/16'', is recommended.
Medium-sized tiles (12'' to 16'') can easily accommodate grout lines up to 3/16'' for the desired effect. Larger tiles can use very fine 1/16'' or 3/16'' grout lines for a smooth, nearly seamless appearance. Even tiles with lugs can benefit from spacers to increase grout width.
Benefits of Choosing the Right Spacer Size
Selecting the correct tile spacer size for installation has numerous advantages, contributing to a successful and attractive outcome.
1. Uniformity and Consistency of Tile Spacing:
Using the right spacer size ensures consistent gaps between tiles. This promotes a neat, organized appearance, creating a flat and professional-looking surface.
2. Prevention of Tile Lips and Cracks:
Uneven tile lips or height variations between adjacent tiles are not only unsightly but can also pose a tripping hazard. The proper spacer size helps keep tiles level and prevents issues like tile lips and warping.
3. Enhancement of Overall Aesthetic Appeal:
Beyond functionality, the spaces between tiles play a crucial role in the room's design. It affects the interaction between grout lines and tiles, influencing the room's aesthetic. Larger grout lines can create a more traditional look, while thinner lines offer a stylish, modern appearance. By choosing the right spacer size, you can control this design element, ensuring the final look aligns with your vision.
4. Improved Installation Efficiency:
Using the correct size of tile spacers simplifies the installation process, reducing the need for tile adjustments and repairs, thus improving overall efficiency.
5. Meeting Diverse Project Requirements:
Different project locations may have specific needs. Choosing the appropriate spacer size can address these requirements accordingly.
How to Effectively Use Tile Spacers
Before using tile spacers, it's crucial to plan how to remove them. Whether you choose to place them vertically or horizontally, understanding how to take them out is key.
Start by determining the center points both vertically and horizontally in the space. Tools like chalk lines or laser levels will be your best allies to ensure perfect alignment of tiles and spacers.
Begin with the central tile, placing spacers at each corner, ensuring they are level with the edges of the tile. For floor tiles, consider adding two spacers on each side to enhance precision. As you expand, always snug new tiles against the spacers to maintain consistent gaps.
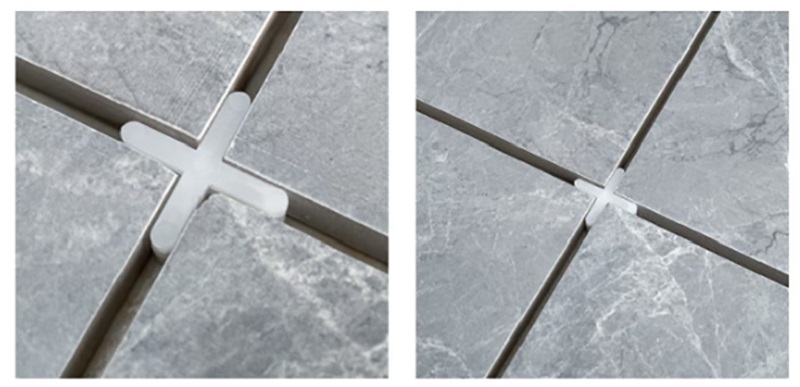
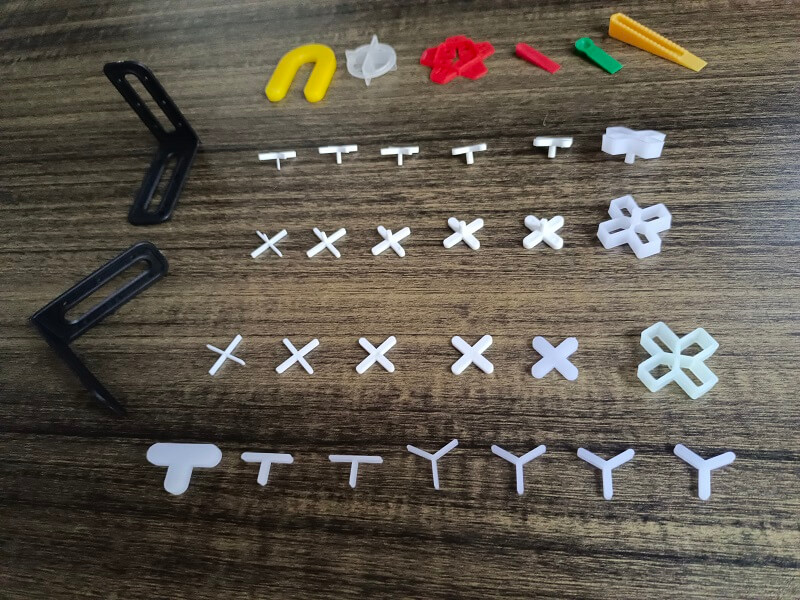
Tiles come in various patterns, and your spacer placement should adjust accordingly. For a standard square layout, cross-shaped spacers snugly fit at the intersections of four tiles. However, when tiles are laid in patterns like herringbone or brickwork, a single leg of the spacer is sufficient.
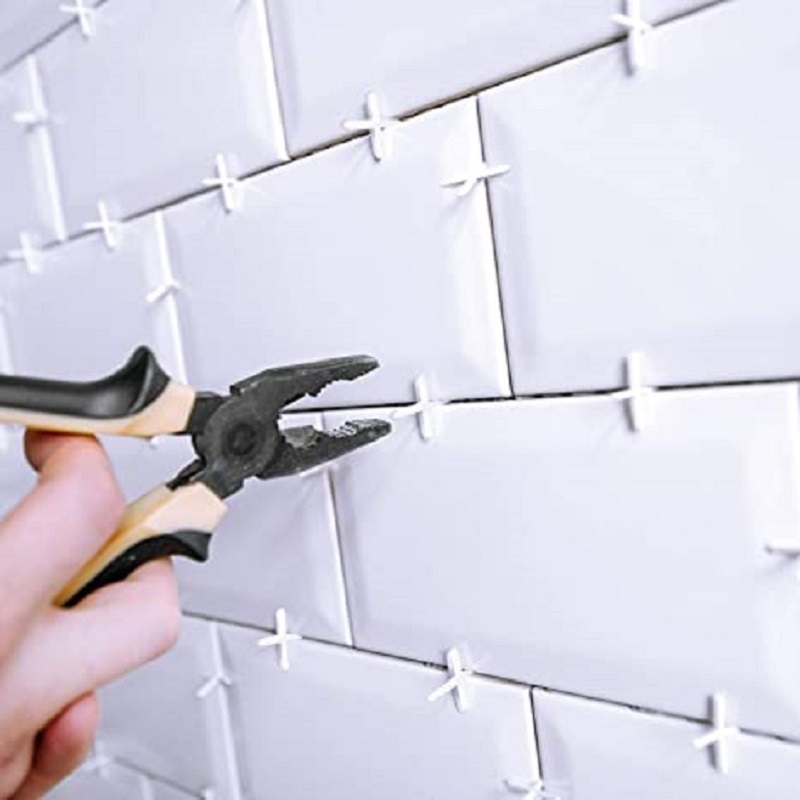
This method, sometimes called "projecting" or "tombstone style," requires fewer tools for gapping but may pose challenges during spacer removal after the adhesive hardens. Tools such as pliers or specially designed horseshoe-shaped spacer removers can simplify the removal process.
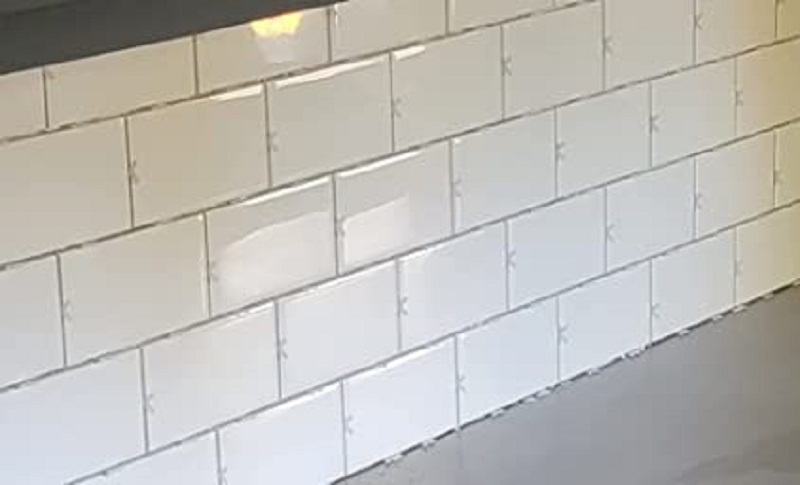
While many prefer placing the entire spacer beneath the tile, there's a popular alternative method known as "projection." This involves using only one leg of the spacer, particularly useful when tiles meet walls or in unique patterns. Though this method may require more spacers, proper tools like needle-nose pliers can easily remove them.
Once tiles are securely in place, wait 20 to 30 minutes (refer to the supplier's recommendations) before removing spacers, using fingers or needle-nose pliers for a smoother process. After removing spacers, you can proceed with grouting, sealing the spaces between tiles, and solidifying your professional appearance.
Tips and Tricks for Using Tile Spacers
Using tile spacers can greatly enhance the tile installation process.
Easy Removal:
When using small spacers for fine grout lines, removing them by hand can be challenging. To simplify the process, use needle-nose pliers carefully. Remember to handle small spacers with care to avoid breakage.
Create Unique Effects:
Experiment with different spacers to create varied grout line widths, especially when working with mosaics or border patterns. This technique adds visual interest and versatility to your tile installation.
Consider Tile Conditions:
Different tile styles suit different shapes of spacer gaps. For example, hexagonal tiles can have a Y-shaped gap. Those aiming for creative layouts can opt for T-shaped or Y-shaped spacers. Special tile spacers with handles are now available, designed for easy removal after use. Choose styles based on the appearance during layout.
Room Size and Gaps:
For smaller rooms, choose smaller spacers to maximize tile usage and give the illusion of more space. However, consult your client to ensure their preferences align with your choices.
Inconsistent Walls:
Not all rooms have perfectly square dimensions or walls equidistant at all points. If noticeable variations exist, consider using larger gaps to minimize their impact on the overall tile installation.
Test Different Positions:
Prioritize planning and don't settle for the first choice. Try different tile placements and gap options to determine the most appealing room layout. Each room may require different spacing, and there's no one-size-fits-all solution.
Save on Tile Cuts:
By adding an extra millimeter to tile gaps, you can significantly reduce the number of small cuts required. This can save time and effort, especially when spanning walls or floors. Alternatively, using wider spacers can reduce the need for tile cuts, saving both time and money.
Stress Relief and Minimum Spacer Width:
Maintaining stress relief is crucial in tile installation. The thickness of wall tiles should avoid going below 1/12'', while floor tiles should stay above 1/8''. These minimum widths provide necessary flexibility to accommodate climate-induced movements and prevent tile cracking or warping.
Keep it Straight:
When laying tiles and spacers, use chalk lines or laser levels for professional precision. This ensures straight lines on the floor and enhances overall aesthetics.
Unusual Outlines:
Consider curves around shower areas, toilet bases, and sink pedestals, as they can affect the overall design. Not all rooms have uniform shapes or evenly spaced walls. To mitigate inconsistencies, choose larger grout spacing.
Remember
, meticulous planning is crucial. Before finalizing the tile layout, place a sample in the center of the room. This helps preview the design from various angles. Test different placement positions and select the one that best suits the room aesthetics.Conclusion
Choosing tiles involves more than just considering their appearance; it's about ensuring each tile fits perfectly with the next. As we've discovered, the right spacer size, layout planning, and expert tips can elevate your tile project from ordinary to extraordinary. Keep in mind that in the world of tiles, details matter the most.
 What Are The Disadvantages Of Tile Spacers?