Decking Pedestal Systems
Our decking pedestal systems is an efficient and robust solution designed to elevate and support various decking surfaces, whether for residential or commercial projects.
The system offers precise height adjustment, enabling perfect installation even on uneven ground, and is compatible with a wide range of decking materials. Made from highly weather-resistant materials, it ensures stability and performance in the most outdoor environments. Easy to install and maintain, our decking pedestal system provides reliable support for creating level, attractive, and low-maintenance decking spaces.
Experience unparalleled service as we guide you through installation and ensure precise leveling. With durability and versatility, our pedestals simplify decking projects, guaranteeing a seamless finish.
Trust us to elevate your outdoor experience with our top-quality decking pedestals and dedicated support.
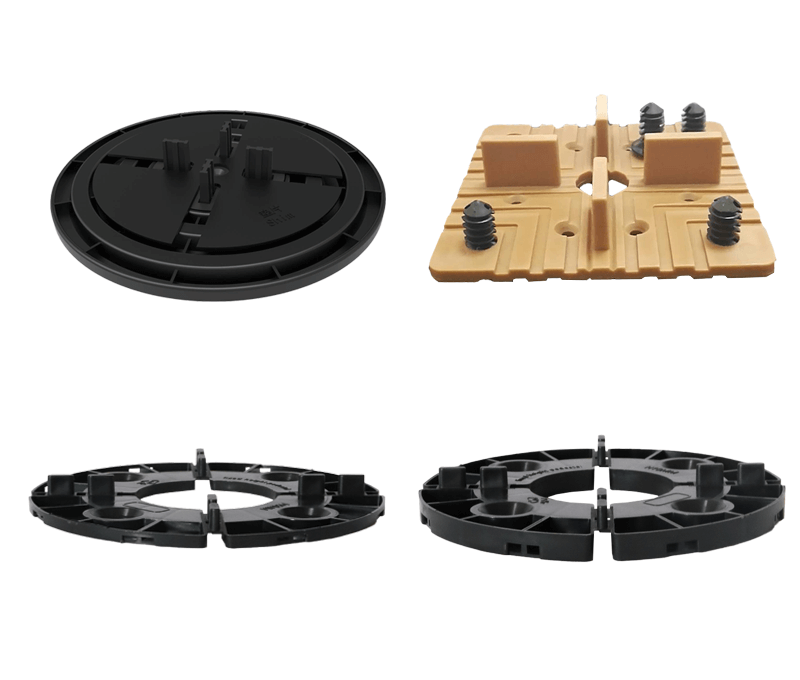
Types of Decking Pedestal
Discover our diverse range of pedestal support systems, covering a full range of heights from 10mm to 1360mm. Offering ease of use, unparalleled versatility and exceptional stability, this system meets all your raised flooring needs.
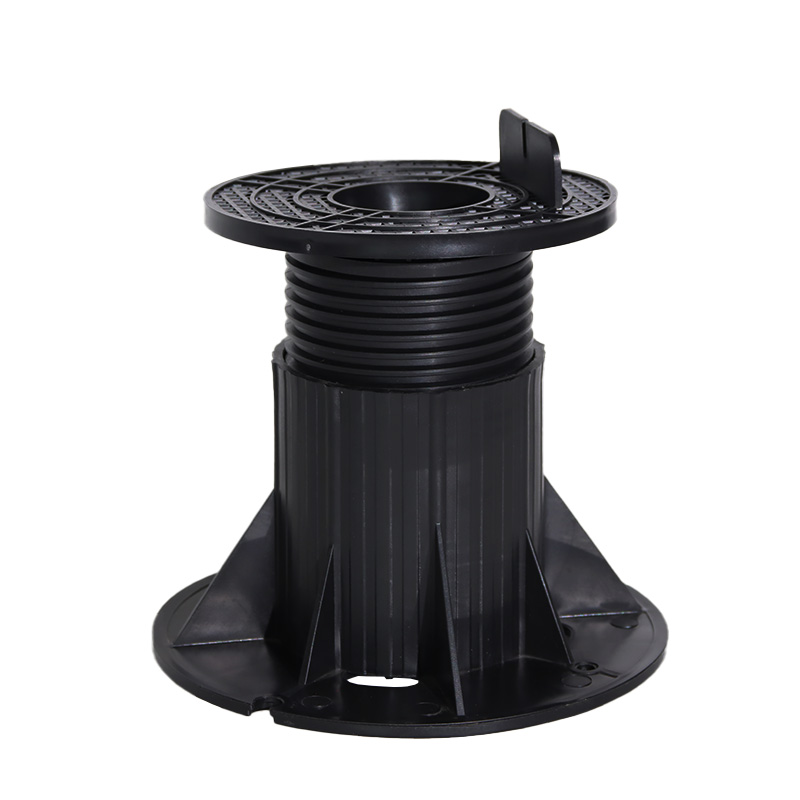
TA-M Series
- Height Range : 46-138mm
- Bearing Weight : 600~1600KG
- Base Diameter : 200mm
- Head Diameter : 150mm
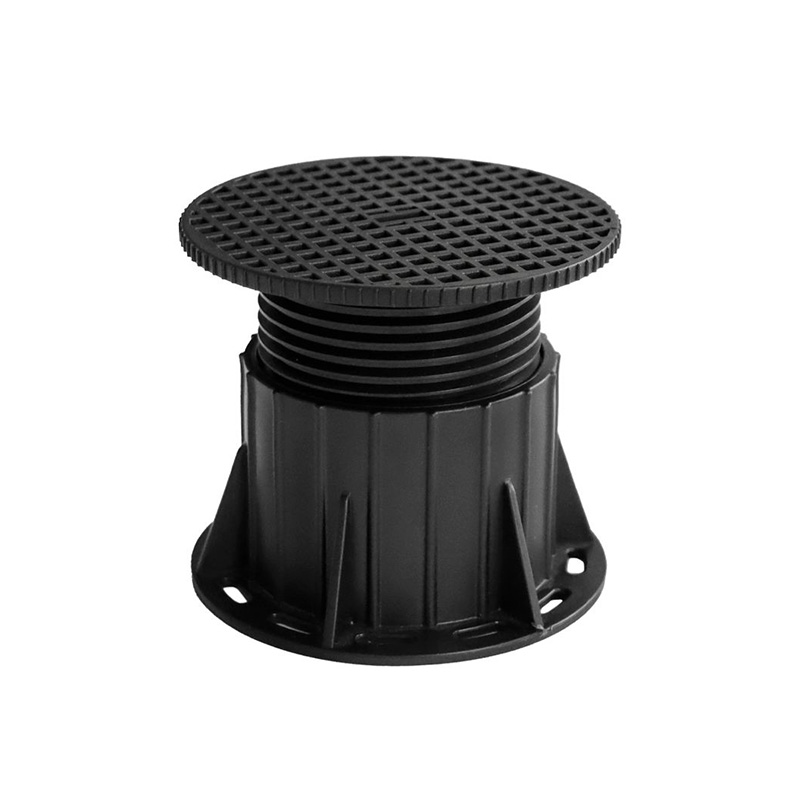
TA-U Series
- Height Range : 19-70mm
- Bearing Weight : 1100~1500KG
- Base Diameter : 200mm
- Head Diameter : 150mm

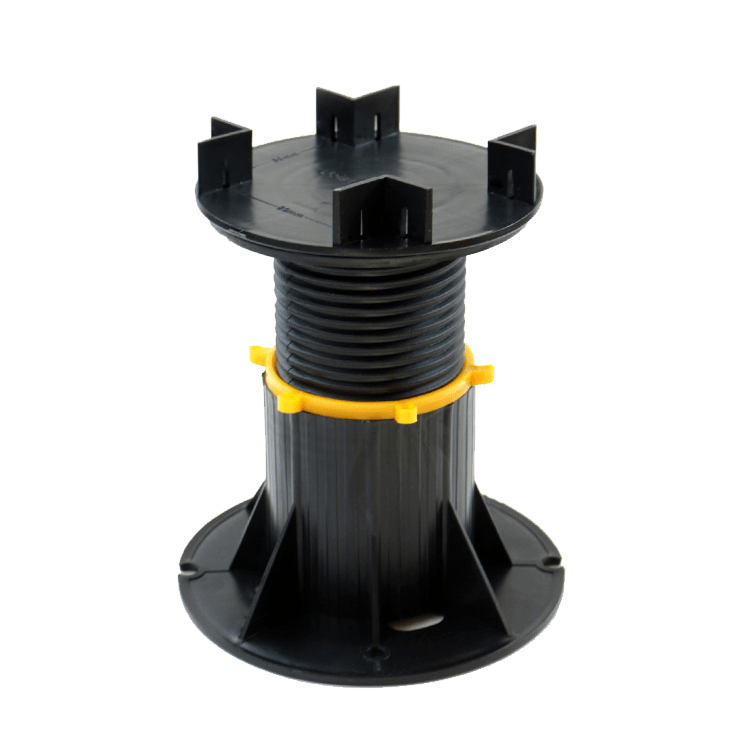
TA-R Series
- Height Range : 75-1360mm
- Bearing Weight : 1200~2500KG
- Base Diameter : 200mm
- Head Diameter : 150mm
TA-NR Series
- Height Range : 90-260mm
- Bearing Weight : 1500~2000KG
- Base Diameter : 200mm
- Head Diameter : 150mm
TA-V Series
- Height Range : 52-225mm
- Bearing Weight : 600~900KG
- Base Diameter : 200mm
- Head Diameter : 120mm
TA-A Series
- Height Range : 46-820mm
- Bearing Weight : 800~1500KG
- Head Diameter : 140mm
- Base Diameter : 200mm
TA-S Series
- Height Range : 20-180mm
- Bearing Weight : 600~900KG
- Base Diameter : 90mm
- Head Diameter : 90mm
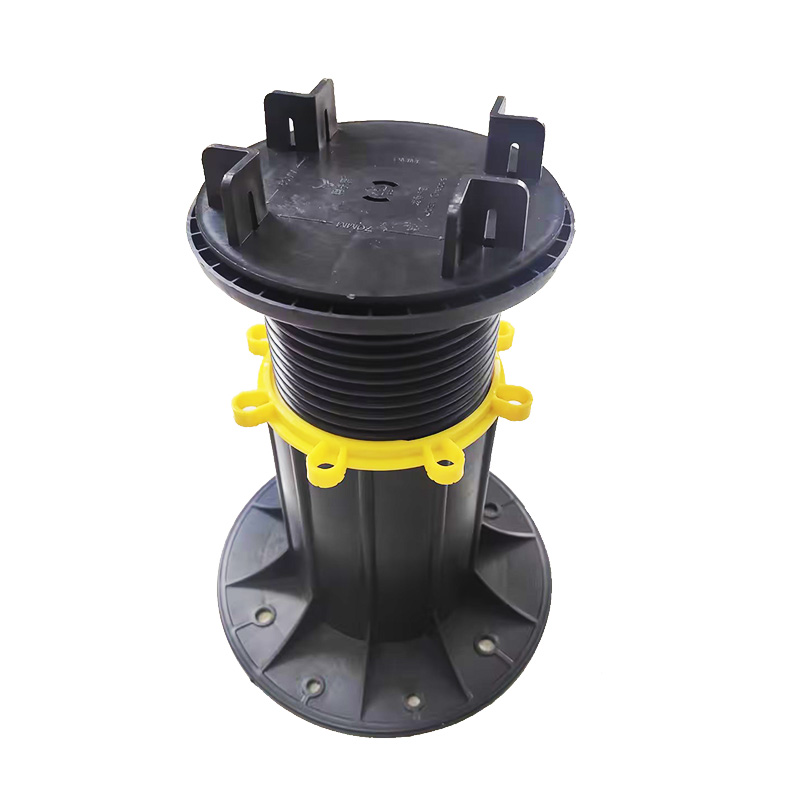
TA-T Series
- Height Range : 180-1360mm
- Bearing Weight : 1200~2500KG
- Base Diameter : 220mm
- Head Diameter : 150mm
Fixed height pedestal
- Height Range : 5/10mm
- Bearing Weight : 3000KG
- Base Diameter : 150mm/200mm
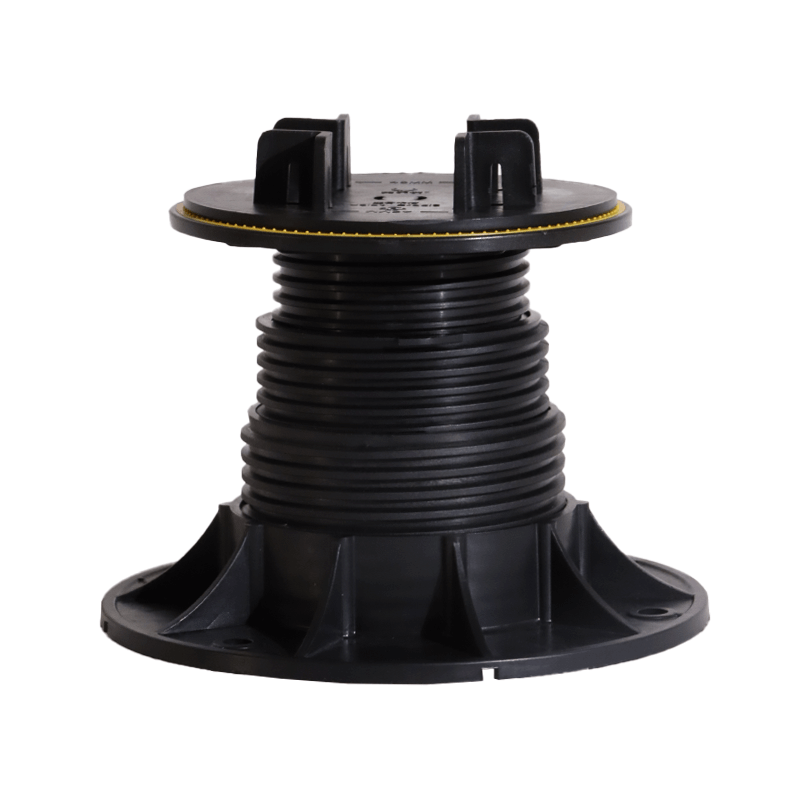
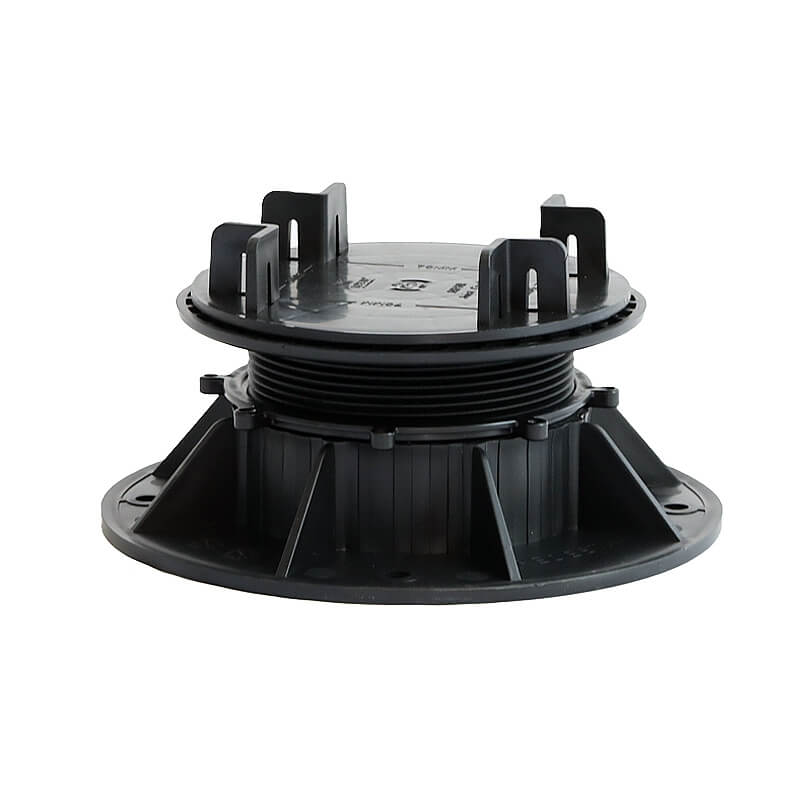
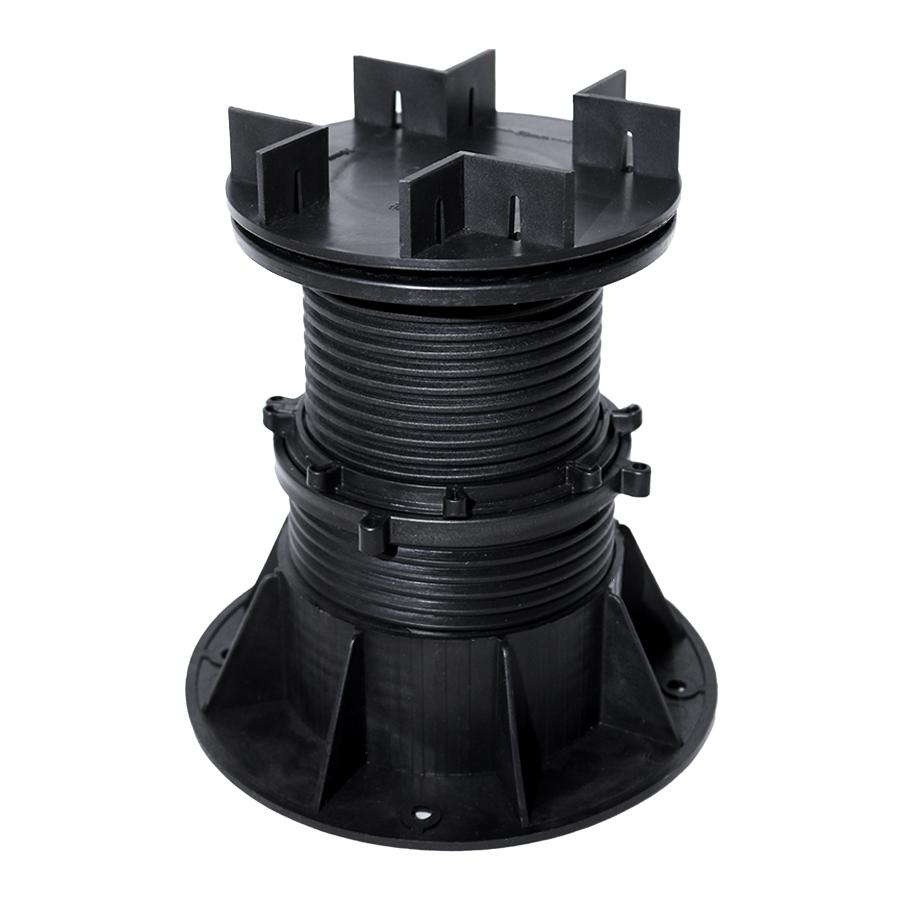
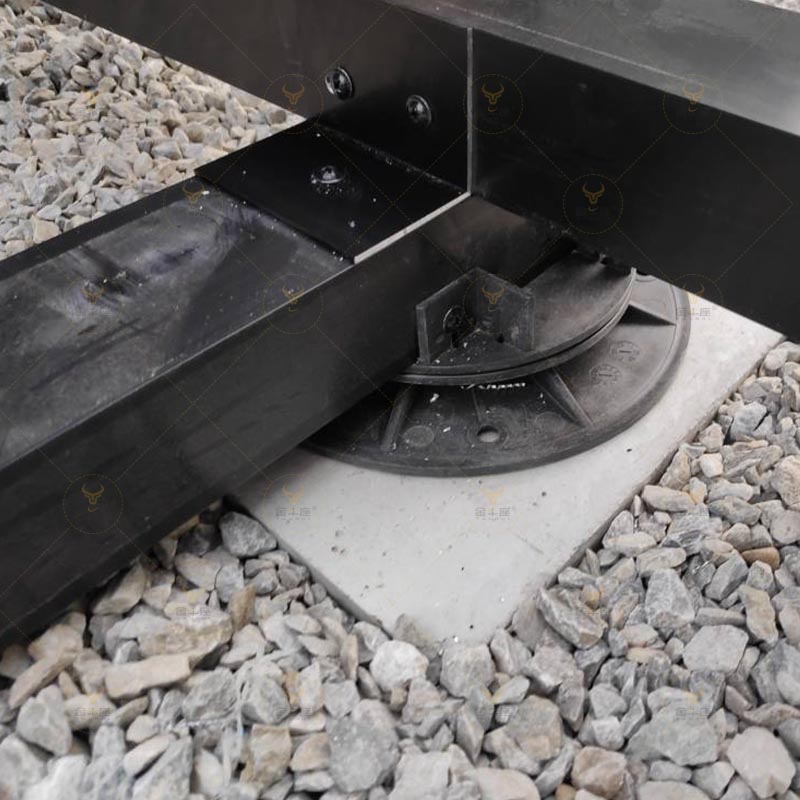
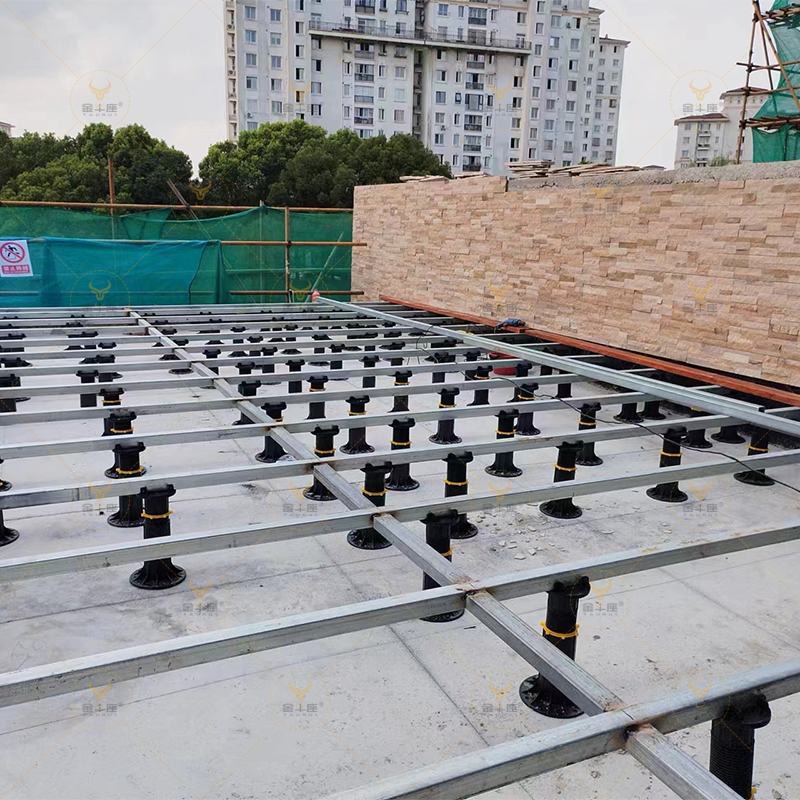
General Component of Decking Pedestals
Taurus has always been adhering to the tenet of "technology-led, quality-first, and people-oriented".
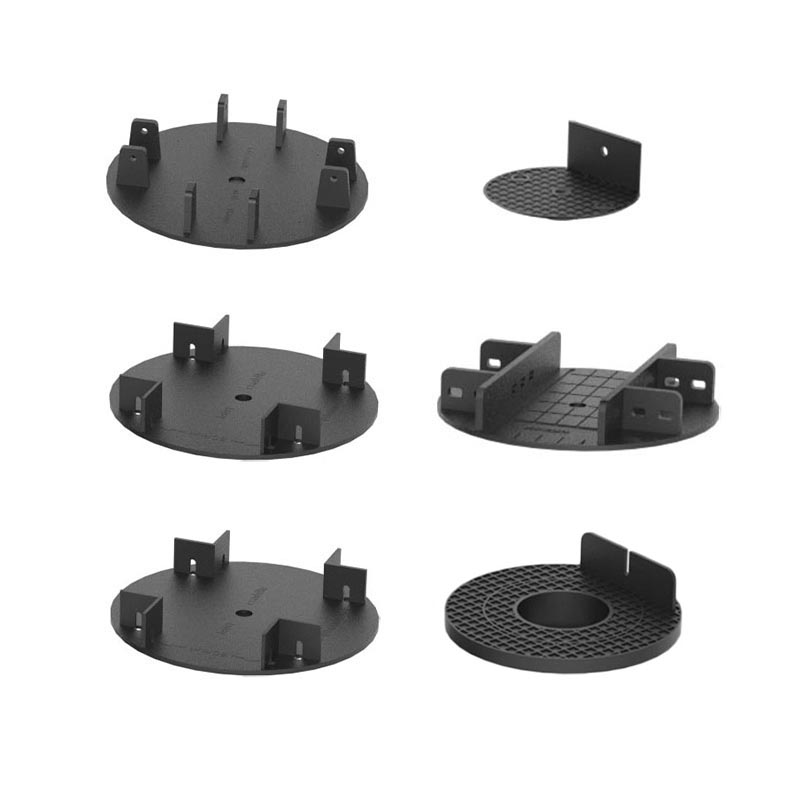
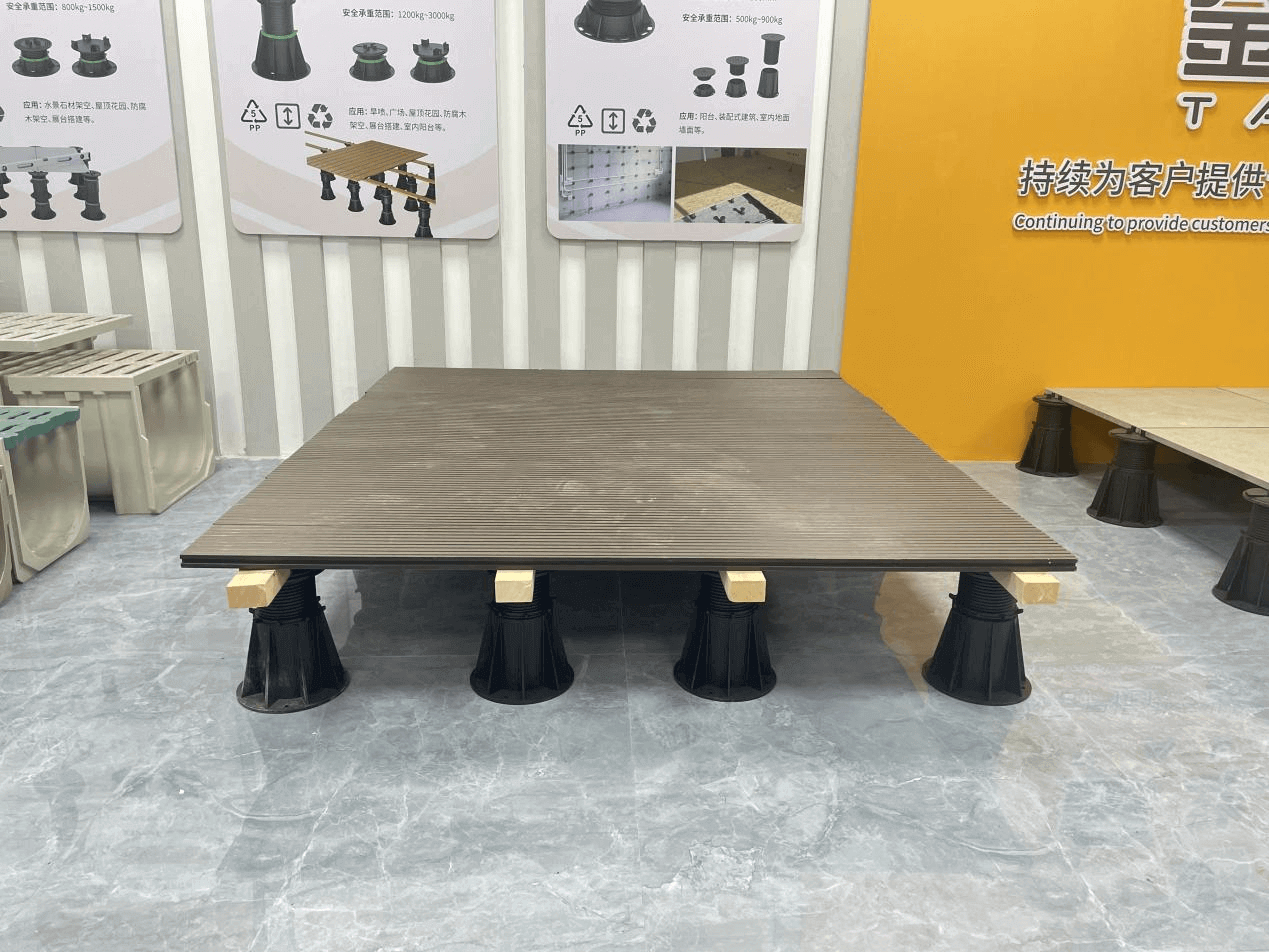
Joist Cradle
The Joist Cradle mainly used for the connection and fixation of wooden floor joists and aluminum alloy joists. The optional sizes are 30-80mm (general keel slot), 40mm, 60mm, 50-70mm, 60-80mm.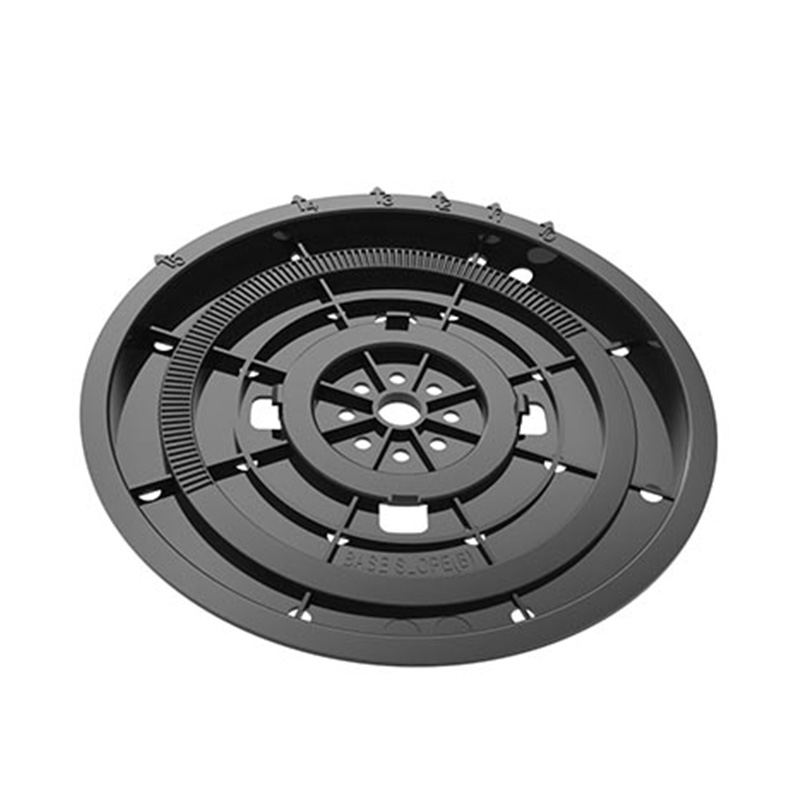
Slope Corrector
The slope is suitable for a base diameter of 200mm, and the slope can be adjusted from 0% to 5% by turning the slope plate.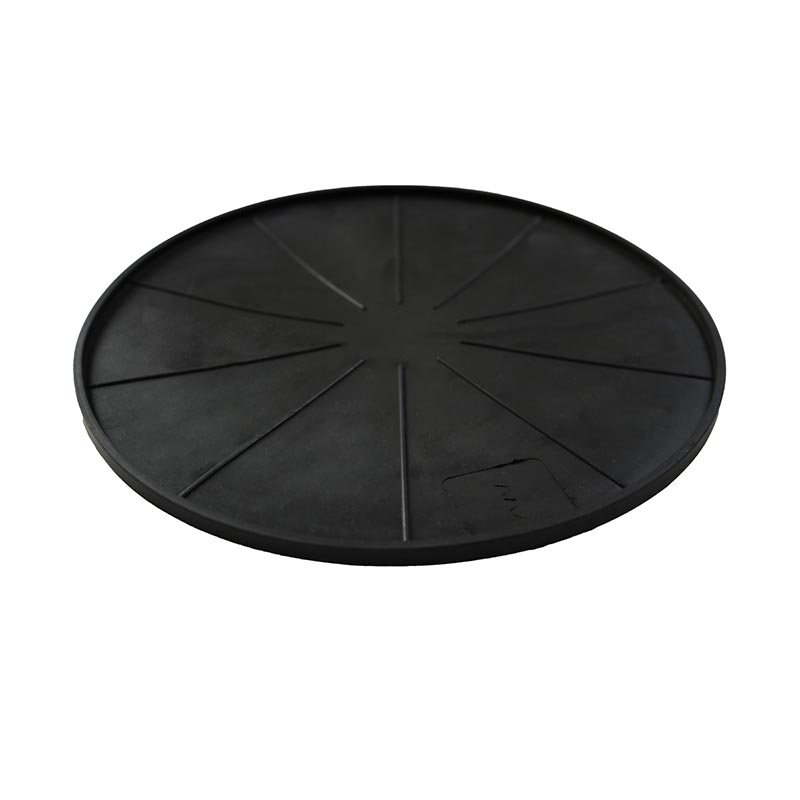
Rubber Pad
The pad is made of rubber, thickness 4.2mm, diameter 210mm. Placed on the bottom of the supporter, its function is to prevent sliding, reduce vibration and noise.Application Areas
Adjustable decking pedestals are widely used in various applications
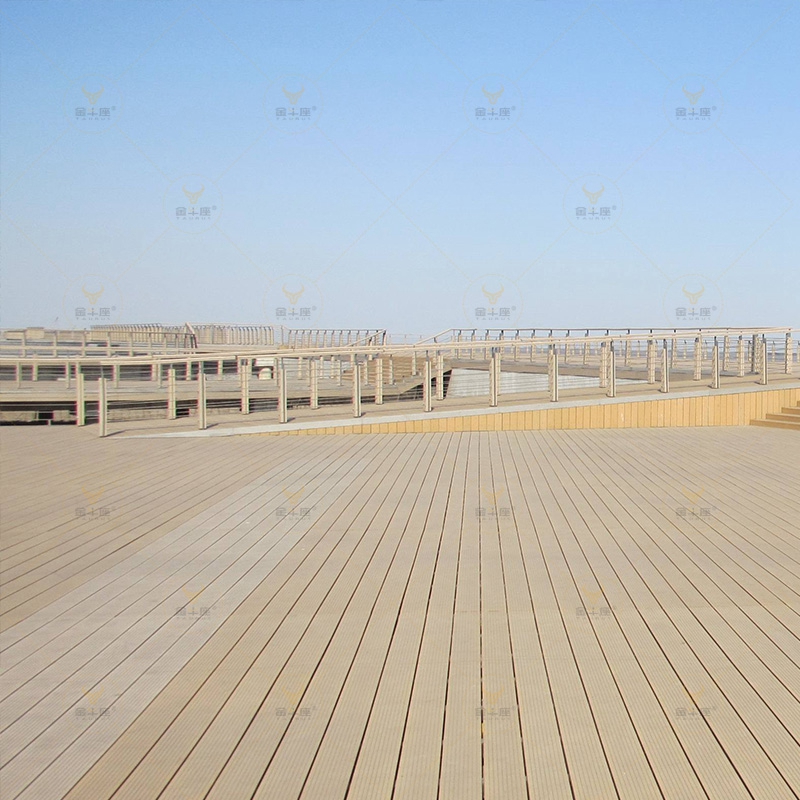
Wooden Decking for Residential Properties
Supports timber or composite decking in backyards, patios, and terraces.Commercial Decking Projects
Used in the construction of outdoor decks for restaurants, hotels, and public spaces.Rooftop Decks
Creates elevated, ventilated decking on flat roofs, enhancing outdoor living spaces.Boardwalks and Bridges
Provides support for elevated decking in parks, nature reserves, and other outdoor recreational areas.Poolside Decking
Ideal for creating non-slip, elevated decking around pools with proper water drainage.
These pedestals are ideal for any project requiring a stable, adjustable, and elevated platform.
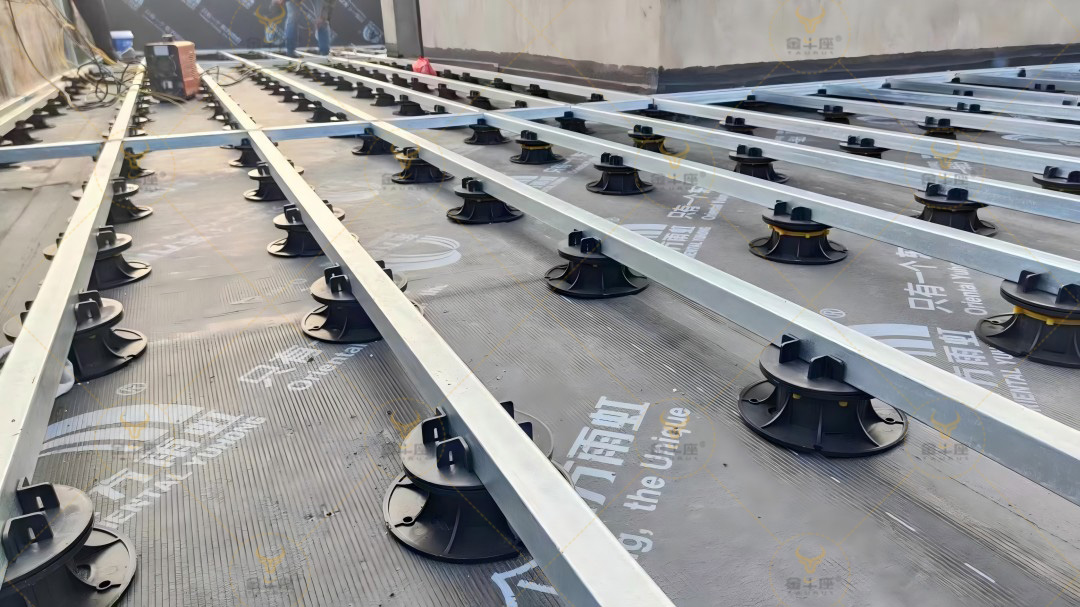
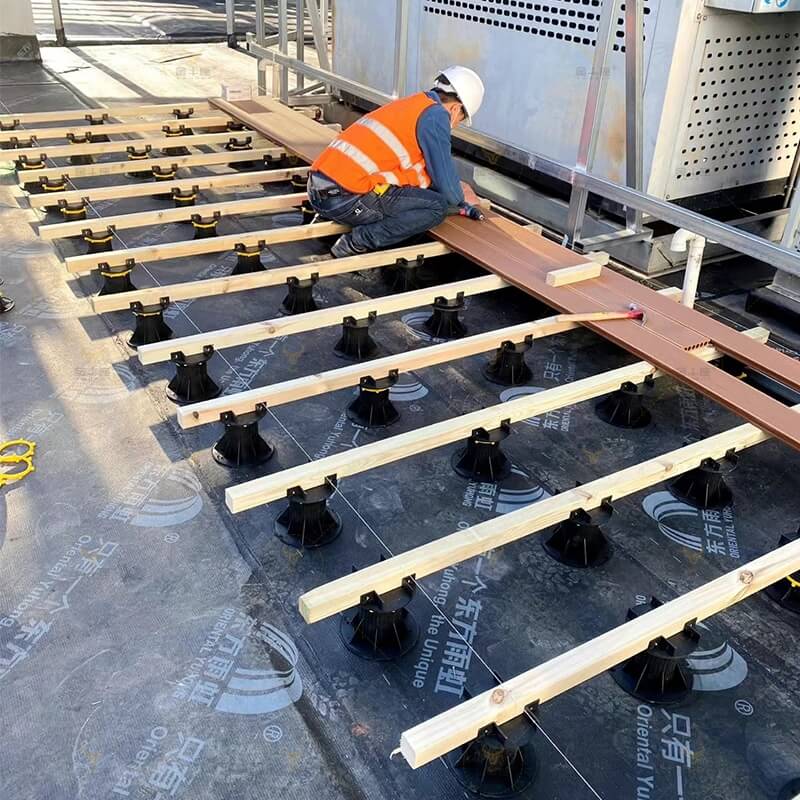
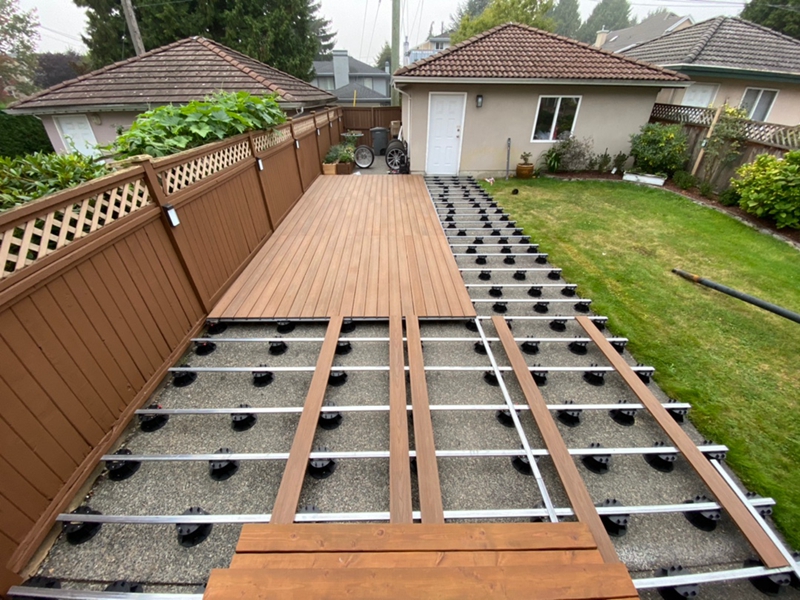
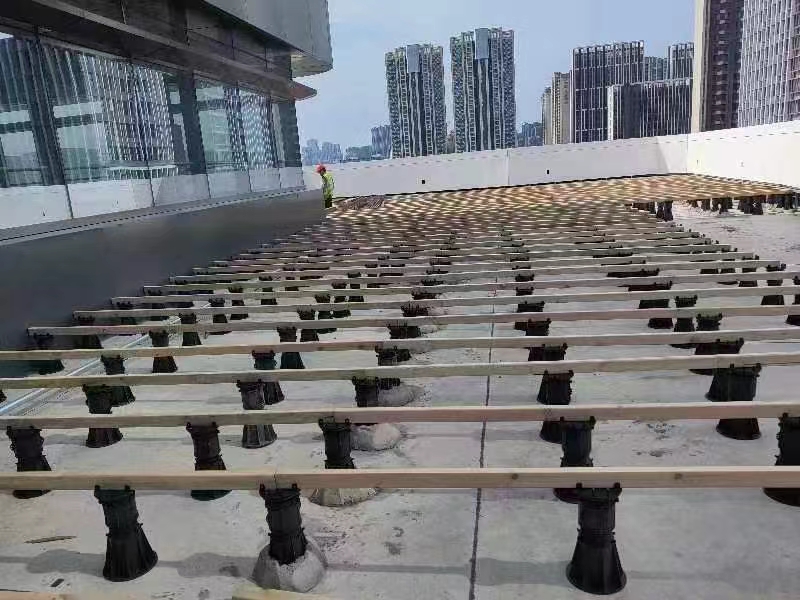
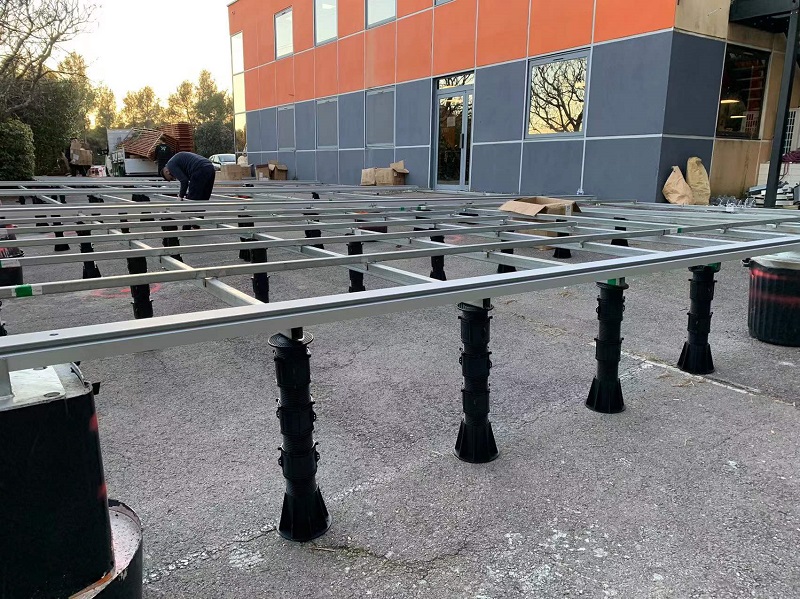
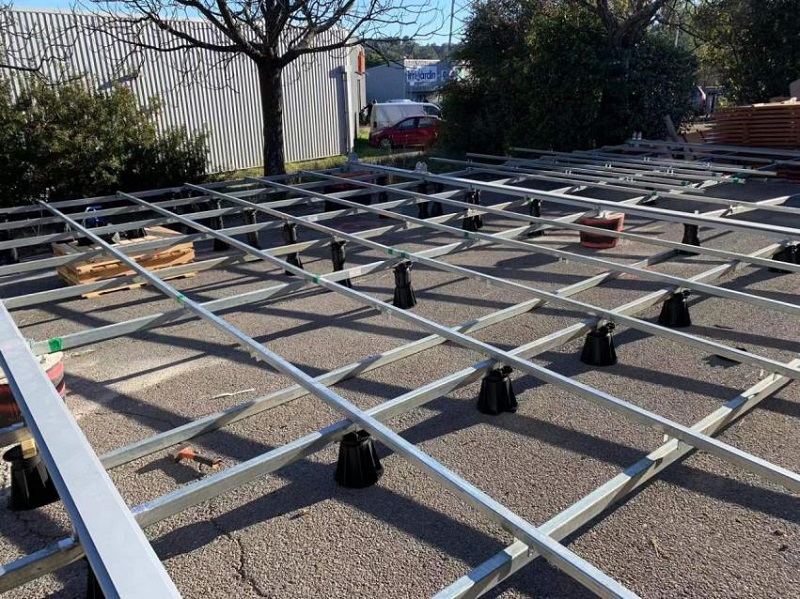
Installation of Adjustable Decking Pedestal
Adjustable decking pedestals are an excellent option for those seeking to construct a level deck on uneven terrain. JNZ offers eight pedestal series, including TA-A/U/R/NR/T/S/V/FH, to elevate your deck. However, it's crucial to properly install these pedestals to guarantee the stability and longevity of your deck.
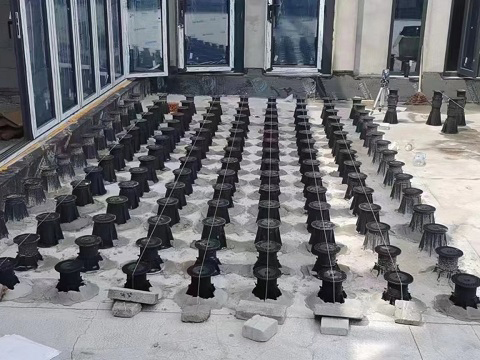
Step 1: Preparing the Surface After cleaning the foundation surface, mark a grid in the area where the pedestals will be placed. This step is important to pre-set the position of each pedestal, ensuring that the distance between each pedestal is maintained at 250-400mm. The height of the pedestal, plus the thickness of the decking and beams, determines the overall height of the platform.
Step 2: Installing the Pedestals Assemble each pedestal correctly and adjust it to the desired height for the project. Once assembled, place each pedestal in its designated position on the marked grid.
Step 3: Installing the Beams Place the beams in the joist slots on top of the pedestals, ensuring that they are oriented correctly. Use a laser level or spirit level to ensure that all beams are level.
Step 4: Securing the Beams Secure the beams to the pedestals using nails. The sides and tops of the joist slots on the pedestals can be nailed to reinforce the connection.
Step 5: Laying the Decking Lay the decking on the secured beams, starting from the corners and working outward.
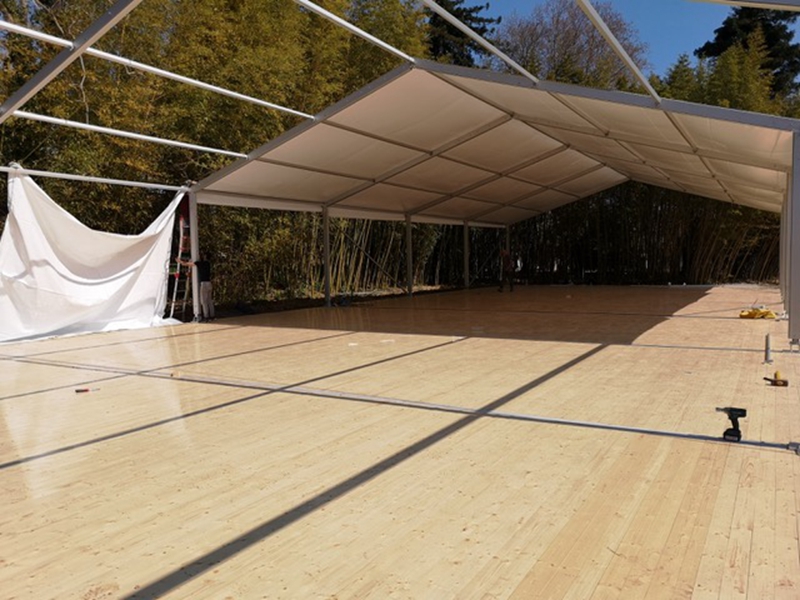
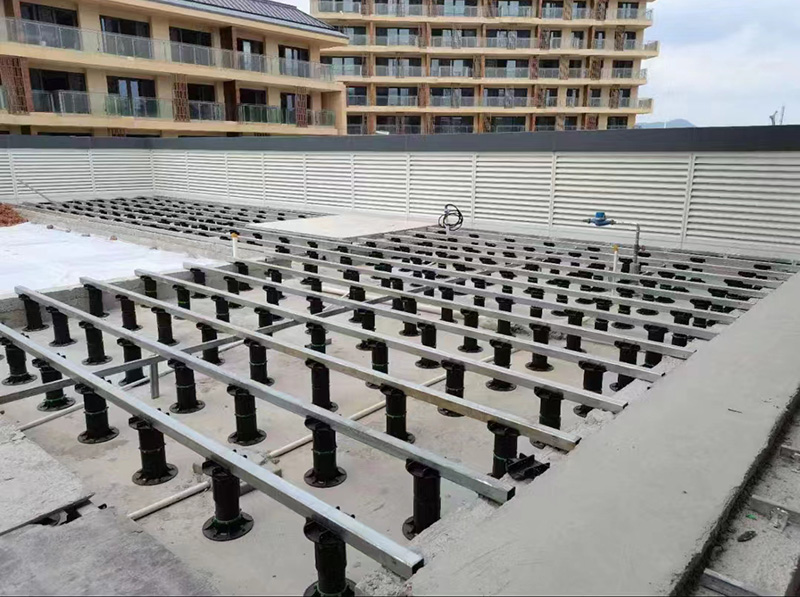
Decking Pedestal Case Study
Garden landscape, roof garden, various wooden platform overhead, square, indoor decoration, balcony/terrace decoration, booth construction, fountain waterscape.
How to Calculate Pedestals for Decking Systems?
Follow our Online Pedestal Calculator to calculate the number of pedestals needed for your decking project. From surface area measurements to spacing recommendations, ensure a flawless and efficient installation.
Frequently Asked Questions (FAQ)
Ready to Take Your Project with Our Decking Pedestal System?
Let's elevate your project to new heights together! Partner with us to continuously explore new possibilities and make your project stand out in the fiercely competitive market.
Is the Decking Pedestal Systems not the right fit for your project?
Explore our Paving Pedestal Systems — it might be just what you're looking for.